Learning Objectives
Understand how to model resources on hardware.
1 – Ensure it does not jeopardize the program execution because of performance issues.
2 – Define timing properties of communicating tasks.
3 – Connect C driver code with AADL models.
4 – Refine ‘base systems’ to specific implementations.
Handout & Setup
The presentation of the lecture on AADL can be found from here.
To run the tutorial, you will need a Linux distribution (tested on Debian and Ubuntu), or Windows with WSL2/Virtual Machines.
The tools and models are provided here. The root directory of the archive contains the following:
- Osate folder:
- A pre-packaged version of OSATE with RAMSES pre-installed.
- Run osate using the “run_osate.sh” script.
- OSATE might ask you to setup a workspace. Choose a path where you would like to save the project and note the path down.
- Use the workspace inside the Osate folder.
Osate/workspace
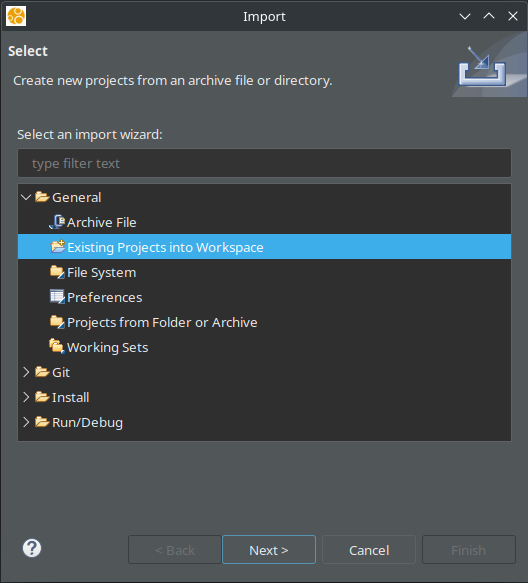
- Import the tutorial-cruise-control folder using Import > General > Existing Projects into Workspace
- Should show up completely in a sec.
- ev3cc.tar file:
- Install docker on your machine
- For Debian based Systems.
sudo apt-get install -S docker.io - For Arch based Systems
sudo pacman -S docker
- For Debian based Systems.
- load EV3CC on docker.
docker load -i ev3cc.tar
- Install docker on your machine
- AI folder:
- AADL Inspector for timing analysis.
- The executable is AI-1.9/bin/AADLInspector
- tutorial-cruise-control folder:
- Contains the AADL and C source files required for the workshop.
- The initial AADL design in these source files is almost complete.
Tools Presentation
The tools you are going to use during this exercise are:
- OSATE, an AADL editor and analysis environment (http://osate.org/)
- RAMSES, a model transformation and code generation tool integrated with OSATE (install it from menu Help>>Intall Additional OSATE Components in OSATE or from https://mem4csd.telecom-paristech.fr/blog/index.php/ramses/).
- AADL Inspector, an AADL editor and tool suite including timing analysis capabilities (https://www.ellidiss.com/products/aadl-inspector/)
The application will be executed on a Lego EV3 robot (https://en.wikipedia.org/wiki/Lego_Mindstorms_EV3), on which the EV3DEV operating system (https://www.ev3dev.org/) has been installed.
How to import the AADL project into OSATE:
- Launch OSATE from the folder.
bash run_osate.sh - The project should already exist in the workspace.
- If not, do the following steps.
- Import the initial AADL design into OSATE: Select menu File -> Import…
- Select General -> Existing project into workspace -> Next -> Select Archive File
- Select the archive file named “tutorial-cruise-control.zip”.
- Click Finish
–> Result: you should have an AADL project named “tutorial-cruise-control” in your OSATE workspace now.
You can navigate through the project to start understanding the design. The easiest way to start is probably to use the graphical editor as it provides a first synthetic view on the architecture. Graphical editor files are stored in the diagrams folder. You can open the one we have prepared for you: lineFollower_LightSensor.aadl_diagram
Let us describe the structure of the model, which contains:
- The root AADL system implementation definition (named lineFollower.LightSensor)
- The hardware platform definition, made up of a processor and memory subcomponents respectively named “EV3_Cpu” and “EV3_Mem”.
- The software application defined as an AADL process subcomponent (named Main_Process) made up of:
- Three thread subcomponents named Th_Background, Th_Control, and Th_Log (respectively for getting the sonar sensor value, control the robot motors and log the PID controler inputs/outputs).
- Three thread subcomponents named Th_Background, Th_Control, and Th_Log (respectively for getting the sonar sensor value, control the robot motors and log the PID controler inputs/outputs).
Textual files contain details that cannot be seen on the architecture diagram. You can open the textual definition of a component from the graphical editor. For instance, select the thread subcomponent named Th_Control, right click on it, and select “Open AADL source”.
You are now on the definition of the thread subcomponent. Its implementation is Control_Thread.impl. In the textual AADL editor, you can use “Ctrl+click” to navigate through model elements. For instance, do a “Ctrl+click” on Control_Thread.impl
You are now on the definition of the thread implementation itself. In this definition, property values have been associated to the thread :
- The Dispatch_Protocol property value makes the thread periodic: the code of this thread will be executed periodically.
- A Period property defines how often the thread is executed.
- A Priority property defines the relative priority of the thread.
- A Compute_Entrypoint_Call_Sequence defines the sequence of subprograms that will be executed when the thread is dispatched. You can have a look at the subprograms definition, in which you will find references to C functions and source files. Do not hesitate to open them to better understand the application.
Tips:
- Yellow arrows in the toolbar (
 ) help you to navigate to/from locations you were looking at in a recent history.
Part 1: Basic Model Editing
In this first step, you are going to try to generate code and deploy the initial design on the robot. Note that AADL source files are stored in the aadl_src folder and C files are stored in the c_src folder.
Importing AADL Packages
To do so, open file “cruise-control-main.aadl”.
You will notice the red error squiggles and a Problem view at the bottom. Find the following in the Errors.
The referenced property set 'ai' of property 'Root_System' is not listed in a with clause. cruise-control-main.aadl /tutorial-cruise-control/aadl_src line: 222 /tutorial-cruise-control/aadl_src/cruise-control-main.aadl Xtext Check (fast)
AI property set requires a ‘with’ clause as described. These allow you to import the specific property sets into the current AADL model. Look for the WITH clauses at the top of the file and then add ‘WITH AI;’ there.
Subprograms
Subprograms are AADL components that describe specific behaviors that the system will execute. These can be described in various ways, either using plain source code in C or Ada, or using a variety of extensions called Behavior Annexes that can support other languages, or even extend AADL for subprogram behavior.
For our task, we will use C code for behavior.
The file cruise-control-subprograms.aadl contains all the Subprograms that are used by the PID controller. In this, the Compute_Distance_Error subprogram is empty. We will connect this to the source code in c_src/pid_error.h (and the respective ‘.c’ file.)
The function signature is as follows.
void compute_error(
    int current_distance,     // Input
    int required_distance,    // Input
    float* computed_error     // Output
);
Properties
We declare the properties by putting the properties keyword inside the subprogram. (Hint: Use the other subprograms as inspiration)
We declare 3 properties.
- Source_Language
This declares the language in use. - Source_Text
This is a List. AADL uses Round Parentheses with commas as separators.
Write the link to the files for pid_error. - Source_Name
Name of the function we will call.
Once the above 3 are written correctly, we can move to the next section.
FEATURES
The features in the subprogram map to the input and output of the function.
Note: They are order dependent
The syntax for declaring parameters is as follows.
<name> : [in|out] parameter <datatype>
We already have names for our features, which are the same as the ones in the function signature. And the data types (int, float) are available from the Data_Type package. (Data_Type::Int, Data_Type::Float)
Note: AADL is case insensitive. So, the following are all the same (but try to consistent)
current_distance
Current_Distance
CURRENT_DISTANCE
cuRrEnT_DiStANcE   // please do not use Tumblr-case.
Once all the features (parameters) are written, all the errors should disappear (on save)
Code Generation
Now we can start generating some code (without LLMs)
In the outline view (on the right side of the editor), select the system implementation named “Cruise_Control.Main”. This describes the entire system to be generated and therefore is the appropriate target for code generation.
Right click on it (still in the outline view) and click on “launch RAMSES”.
A new window opens to configure RAMSES.
- Select “EV3DEV” as a target.
- Click on “Apply and close”.
Upload the code and have fun
Now, you can upload the executable binary file on the robot to run the line follower.
In case the compilation failed run “sudo make” in the output directory of the line follower project.
How to upload a file on the brick:
- Connect the EV3 brick to the computer with the USB cable.
- Switch on the EV3 brick by pressing the center button.
- Find the IP Address of the EV3 brick on the top of the main menu. (May take some time to show up on connection ~1 minute)
- Open a terminal and run:
$ cd <path-to-line-follower-folder>/outputs/ $ scp ./generated-code/ev3dev/EV3_Cpu/Distance_Control/Distance_Control robot@<ip-address>:~/CruiseControl (password is: maker) - It should take about 4 seconds to upload the code. Any errors during uploading will be shown.
- You can run the program by executing
File Browser > runCruiseControlSudo.sh
on the brick directly.
Part 2: Timing Performance Analysis
Let’s have a look at threads scheduling to have a better understanding of functions execution. We will use AADL Inspector for this, a commercial tool we can use with a temporary license for the summer school.
- Run the AADL Inspector executable from the AI/bin folder that you copied to your computer from the tutorial USB stick or using the shortcut if you are using the provided virtual machine.
- File >> Load.
- Go to the AADL project folder.
- Find the TutorialCruiseControl.aic file.
- Et Voila! You have it loaded.
OSATE and AADL inspector use the same AADL files. Therefore, every time you modify the file from one of the tools, you will need to refresh it from the other tool. For OSATE, you will need to right-click >> Reload the file in AADL-Inspector.
To save the AADL file from AADL-Inspector, right-click >> Save. (CTRL+S doesn’t work – sorry we don’t make the rules) then right-click >> refresh in OSATE.
Once AADL Inspector is launched, you can do schedulability tests (check if the deadlines of the threads will be met).
You may need to select the system to run tests on.
On the right side of the tool, select Timing Analysis

- Click on the Cheese icon (Simulation Timelines)
 You will see the timelines of the tasks of your threads.
Black part is execution, orange is waiting and the grey blocks show the total use. - Click on the Cheese icon with the THE on it (Theoretical Tests). This is Open the diagnostic to understand what doesn’t work.

Observations: the system is not schedulable.
Propose a solution, and test it: how to reduce the cpu load? Modify the model (from AADL Inspector and not in OSATE), and make sure the system is schedulable with your modifications. Note: you cannot change the execution time of the threads, this has been estimated by measuring the timing execution of the object code on the brick. However the period of the threads is a good place to look at…
You can relax the period and deadline a bit for the logging thread (Th_Log), since that is probably not as important to be ‘on time’.
That should get you to a new, and working system.
PresentERS
Dominique Blouin (dominique.blouin@telecom-paris.fr)
Anish Bhobe (anish.bhobe@telecom-paris.fr)