Install Eclipse
Install Eclipse Modeling Tools 2023-03 by following the instructions here: https://www.eclipse.org/downloads/packages/release/2023-03/r/eclipse-modeling-tools/r.
Unzip and run the Eclipse executable.
Install necessary components
First, follow this link to download the zip containing ramses-all.psf and ramses-plugins.p2f. Once the download is complete (which can take anywhere from 1s if you are on earth to something like 20 minutes if you are in outer space or deep in the countryside), unzip it inside the directory of your choice.
In eclipse, click on “File >> import >> install >> install software item from file >> Browse” and find and select “ramses-plugins.p2f”. Click on next and let the wizard do the job. When the plugins are done installing, just restart Eclipse.
Alternative installation method in OSATE
In OSATE is possible to follow the same procedure that we did on Eclipse to create a Development Environment. But in case it does not work due to conflicts among the dependencies you can install them by hand following the next steps.
First, you need to add some update-sites, to do this go to “Help >> Install New Software… >> Add…” now on “Location” insert “https://download.eclipse.org/releases/neon/” and name it as you prefer, finishing by clicking on Add.
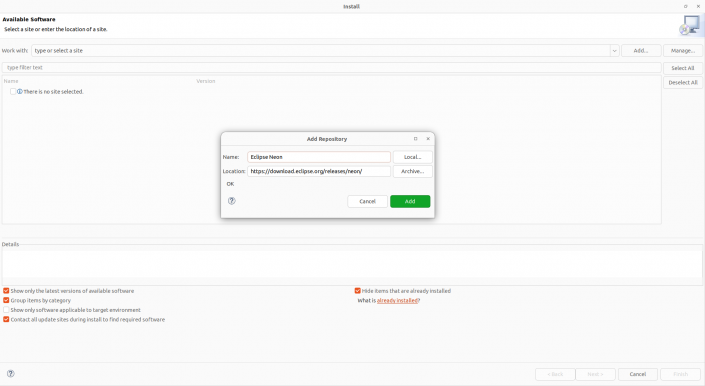
Repeat this step to add the following update-sites:
- “https://www.hpi.uni-potsdam.de/giese/update-site/” – MDELab
- “https://mem4csd.telecom-paristech.fr/download/update-site/” – MEM4CSD
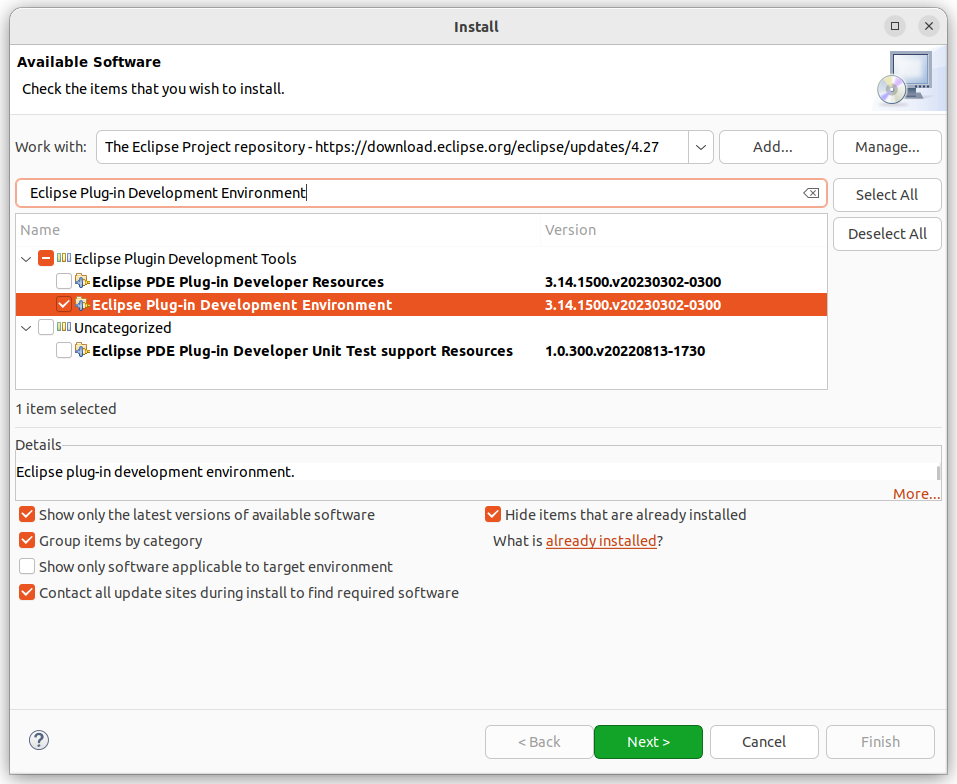
Now from these update-sites you need to install several plug-ins. To do so, on the same “Install” window go to “Work with”, here search for Eclipse Project repository – “https://download.eclipse.org/eclipse/updates/4.27” and look for the following plug-in ticking their box click “Next” to install (if upon the installation you are prompted to trust the plugins, you must trust all of them) after the installation OSATE will prompt you to restart, which you must do for the plugin to be correctly installed:
- Eclipse Java Development Tools.
- Eclipse Plug-in Development Environment (PDE). You may have to uncheck “Contact all update sites…” if you get an error when installing PDE.
Repeat this process from Eclipse Repository https://download.eclipse.org/releases/2023-03 installing the following pulgins:
- Xtext Complete SDK
- Model comparison (EMF Compare)
Now search on the “Work with” for MDELab update-site and install the two following plugins:
- MDELab Workflow
- MDELab Workflow – ATL Transformer Component
And finally search on the “Work with” for MEM4CSD update-site to install the last plugins:
- MEM4CSD-Utilities analysis results language feature
- MEM4CSD-Utilities eclipse feature
- MEM4CSD-Utilities IDE feature
- MEM4CSD-Utilities models comparison feature
- MEM4CSD-Utilities OSATE Feature
If everything worked out fine, by now you should have a functional Development Environment for RAMSES.
Get the source code of RAMSES
Go on you package explorer. Right-Click, then click on “import projects >> Team >> Team Project Set >> Browse” and find and select “ramses-all.psf”. Click on next and finish the installation. Wait until the import is complete and you are done.
Congratulations for installing RAMSES!
Launch an Eclipse Application with RAMSES
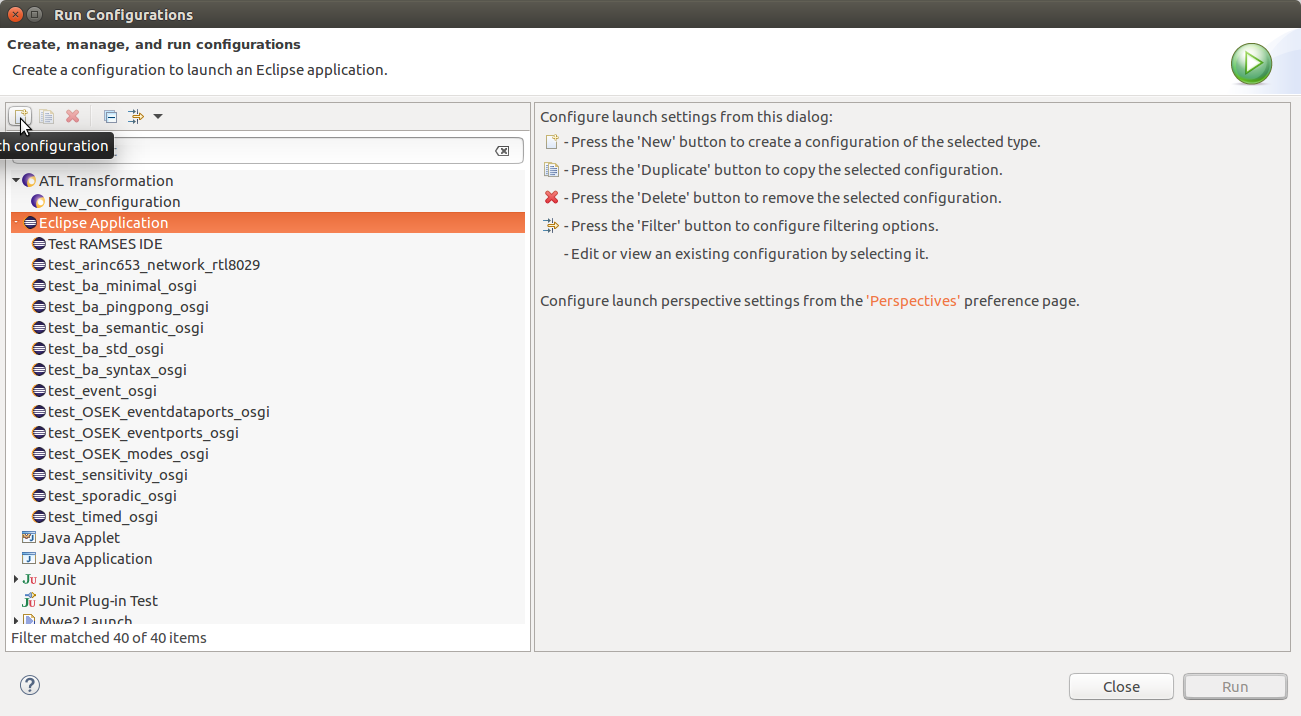
To run a test of the Eclipse Application, go in “Run >> Run Configurations…”. Create a new Eclipse Application:
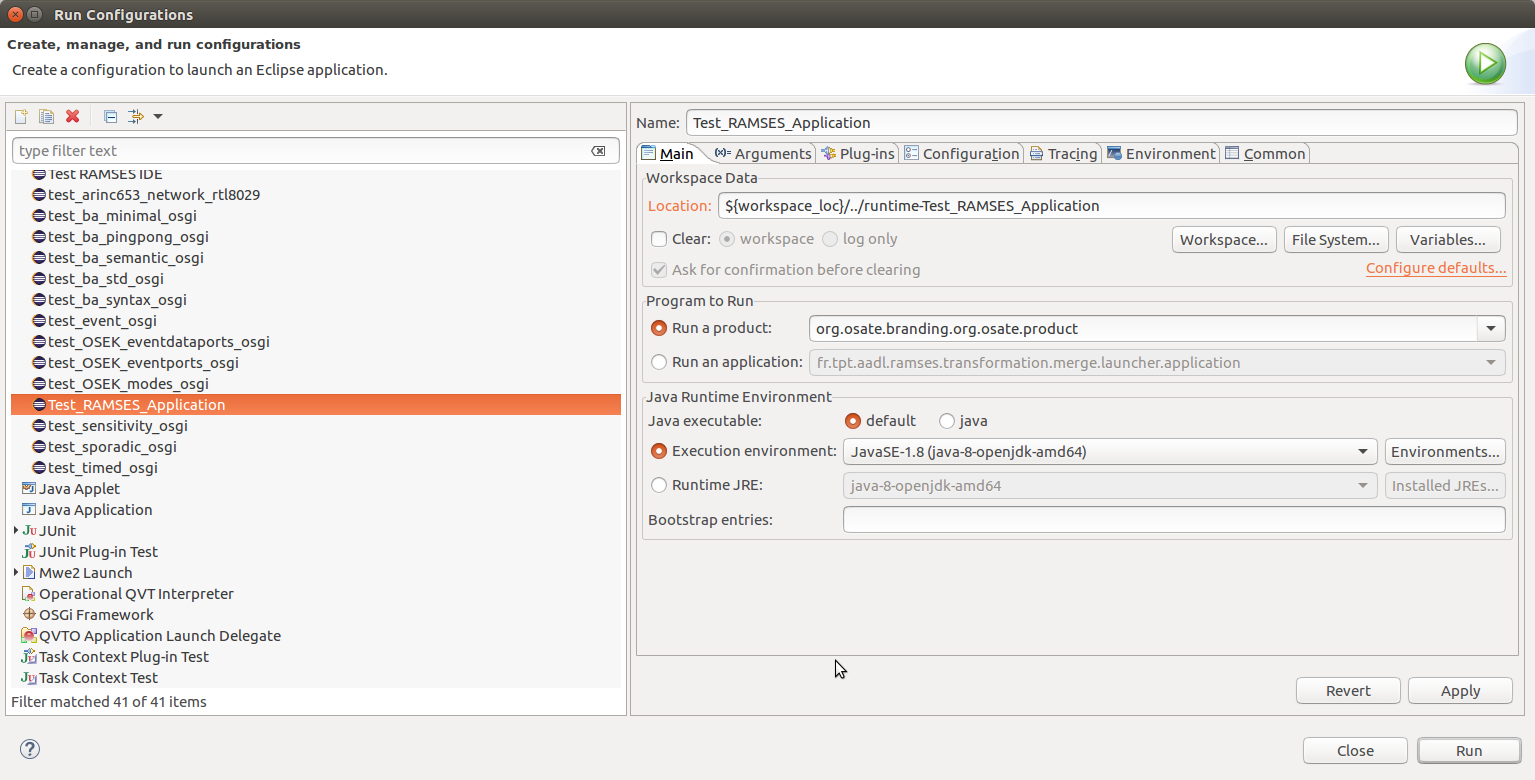
We will rename this application “Test_RAMSES_Application”. Choose the osate product to launch:
Go in the “Plug-ins” tab. Select”plug-ins selected below only”. Remove the “Target Platform” selection and then click on “Add Required Plug-ins”:
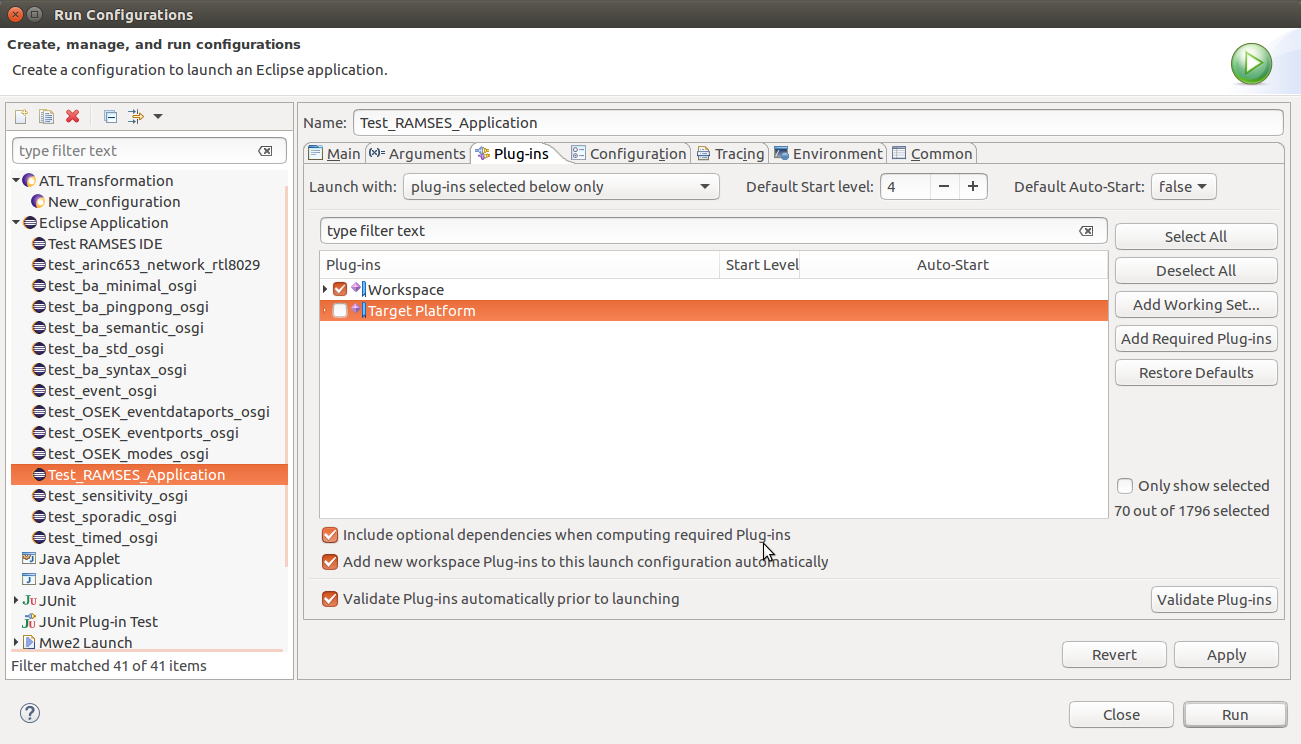
Click on “Validate Plug-ins”. If there are missing plug-ins, add them manually in the “Target Platform” list until “Validate Plug-ins” doesn’t get any error.
Note: If there is the plug-in “org.eclispe.e4.ui.workbench.swt” which needs “osgi.extender”, just select the plug-in “org.eclipse.equinox.ds”. It should resolve this problem
Click on “Run”. It launches a new Eclipse Application but with OSATE and RAMSES installed on it.
To verify if the installation worked, test an example by following instructions on this link.