Step 1: Download Eclipse Modeling Tools
Due to the current project constraints, the Eclipse version should be one that is compatible with the OSATE Tool (2022-03 as of 03/03/2023). Therefore, to install Eclipse Modeling Tools 2022-03 click the following link: https://www.eclipse.org/downloads/packages/release/2022-03/r.
When on-site, you should see the following page:
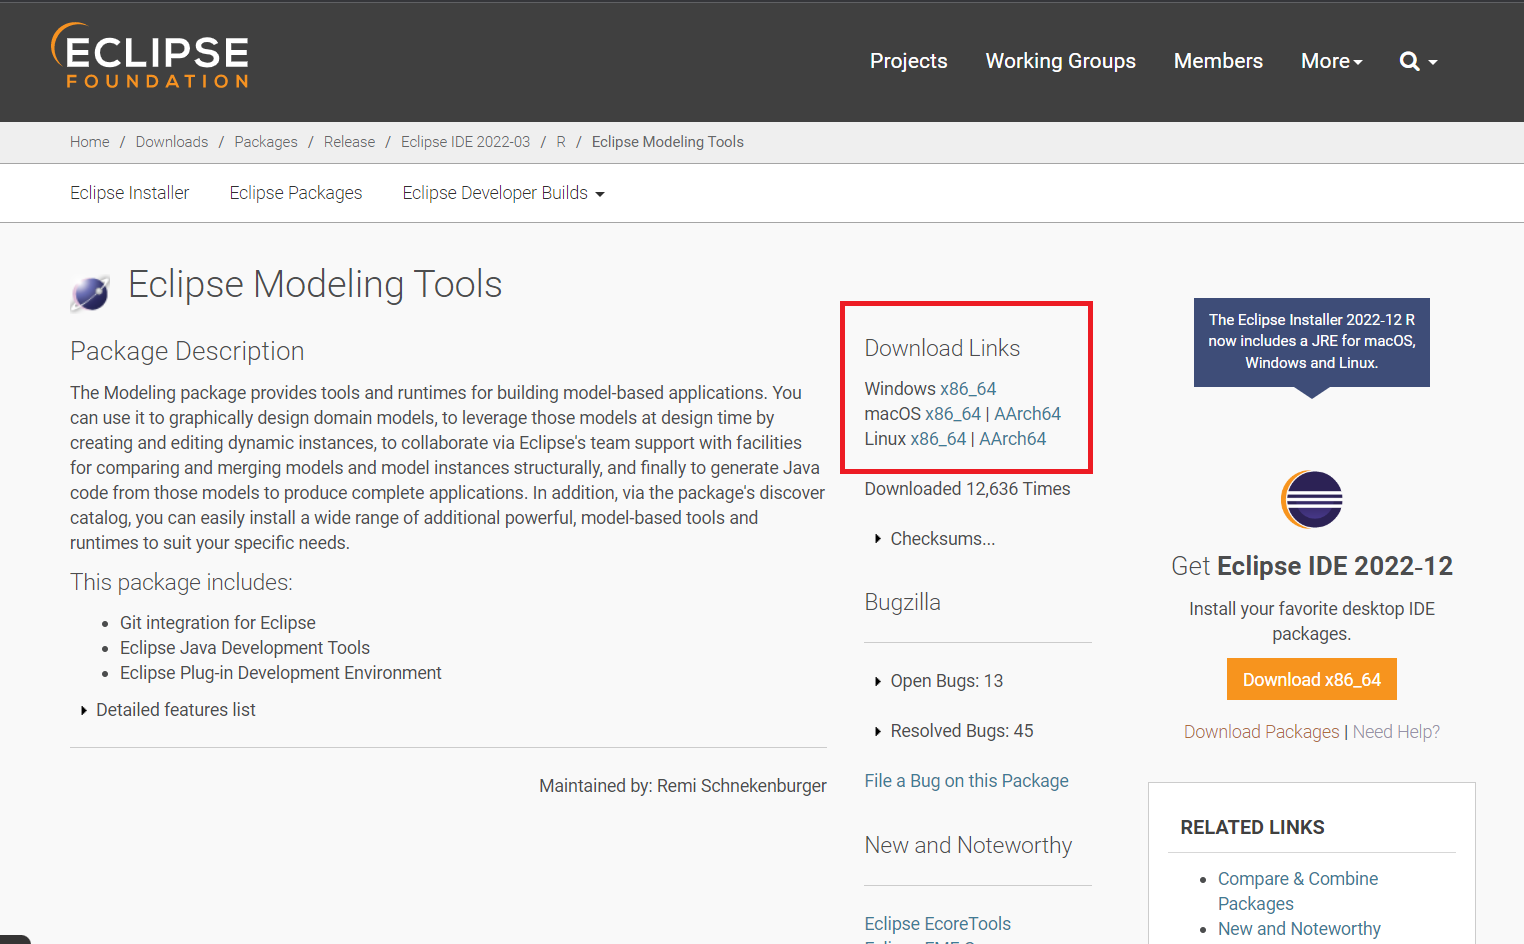
Choose your platform in the area marked by the red square (not present on the web page), then click “Download” on the following page. Then, simply unzip and run Eclipse.
Step 2: Install the MDELab Required Tools
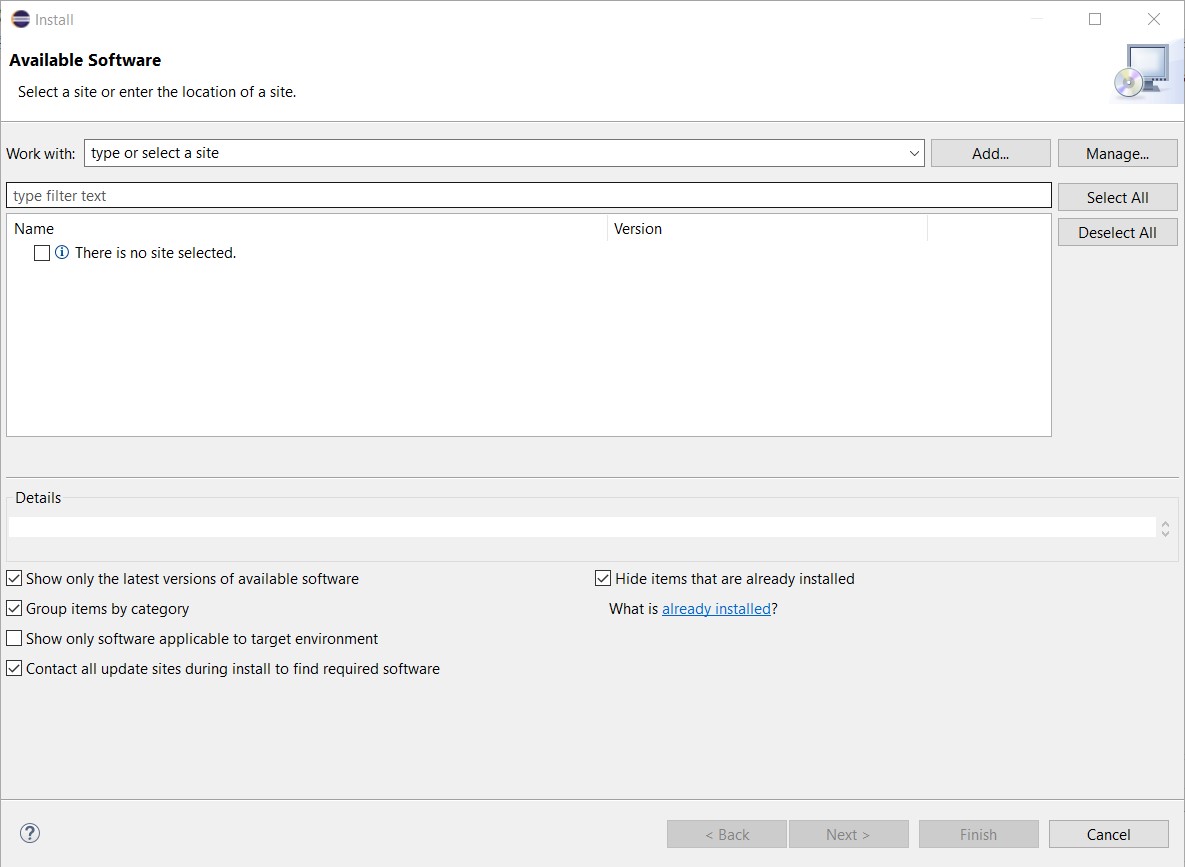
Now that you have installed Eclipse, you need to use the update site functionality to install the required MDELab tools. To do that, go to Help>>Install New Software, and a screen like below should appear.
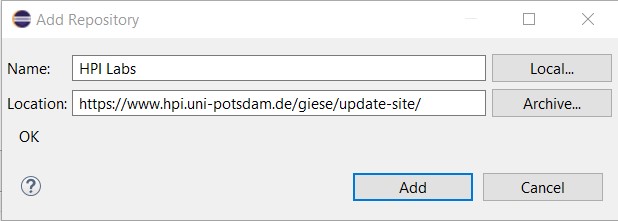
Click “Add…”, then input the following site into the Location field: https://www.hpi.uni-potsdam.de/giese/update-site/. You can, of course, give it whatever name you want.
Select your newly-added update site in the dropdown list. This should make a sequence of features appear right beneath. Uncheck the box “Group items by categories” to find the following features faster :

![]()
Click on “Next”., wait for Eclipse to perform the validation procedures, verify the Install Details, then click “Next” once more. Accept the license agreement (after reading it carefully), then click “Finish” and wait while Eclipse does its job. Now we can move on to the next step.
Step 3: Download the Project Set File
Download this Project Set File. Unzip it wherever you want (remember the location though), then go into Eclipse and click on File>>Import. The following window should pop up:
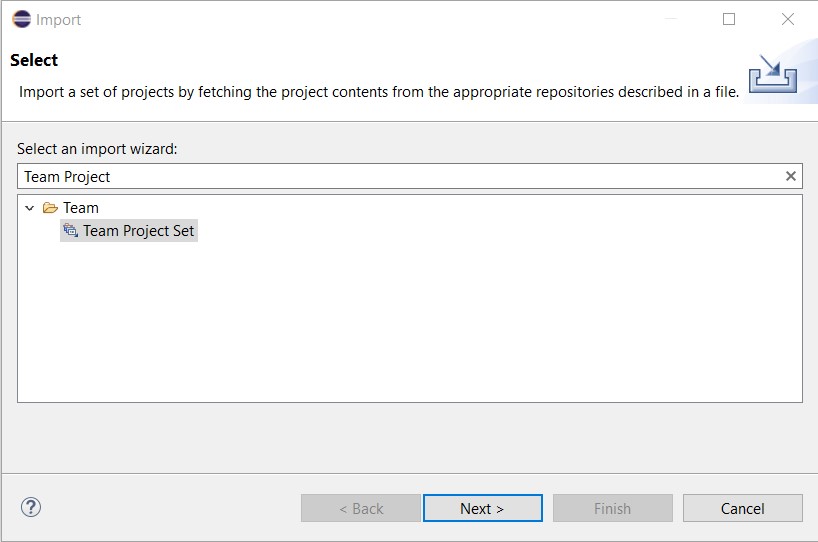
Unroll Team folder and click on “Team Project Set”, then click “Next” (as on the above screenshot).
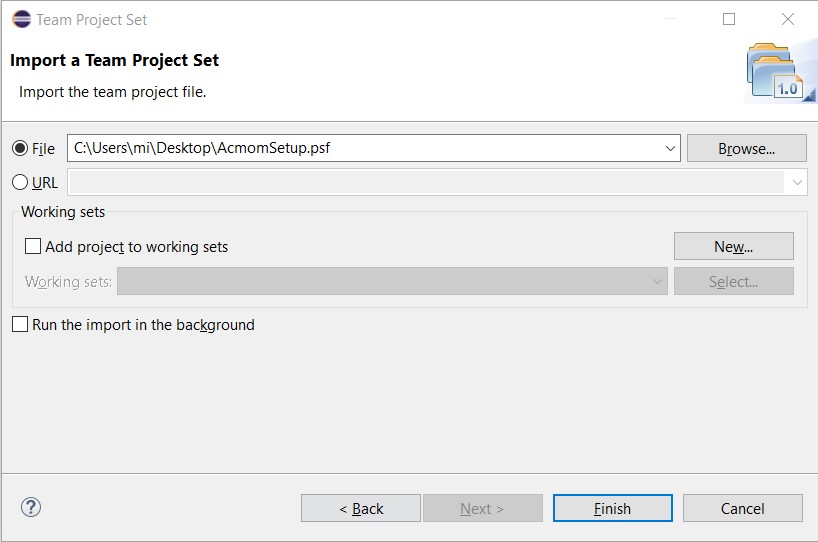
On the next page, click Browse… and navigate to the location you’ve unpacked the downloaded setup file to (you do remember it, right?). Double-click on it, then click Finish and let the wizard do its job.
Step 4: Select the Working Sets
What we’re going to do in this step is to select the working sets to appear in the project navigator. To do that, simply click on Window>>Show View>>Other…
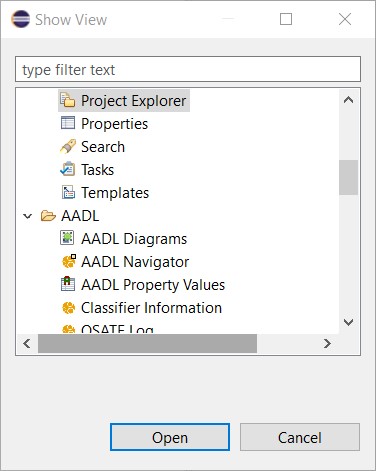
In the “type filter text” field, enter “Project Explorer”, then click on the eponymous view. Once Project Explorer view is open, click on the icon on the screenshot below.
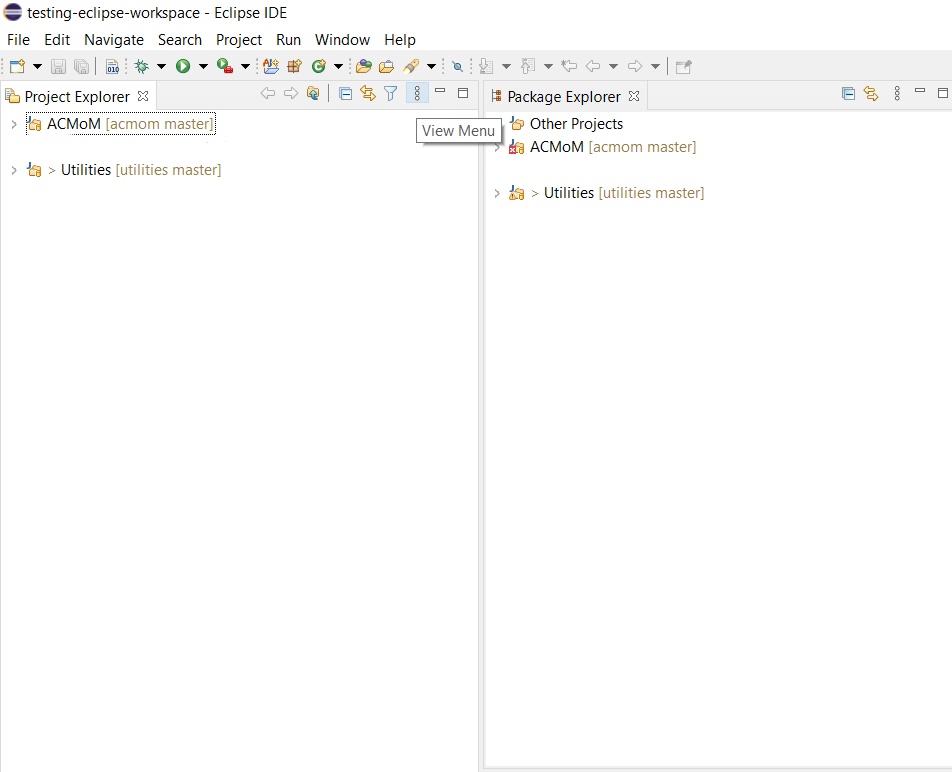
It should open up a roll-down menu, on which we click on “Select Working Sets…”. This should make a popup appear, as below:
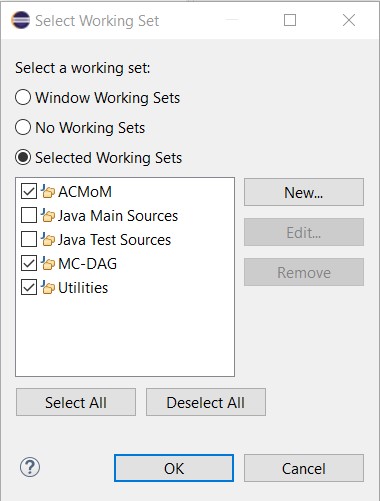
Copy the setup above, click OK. If you wish to observe an example case study, download and import the following file: MC-DAG
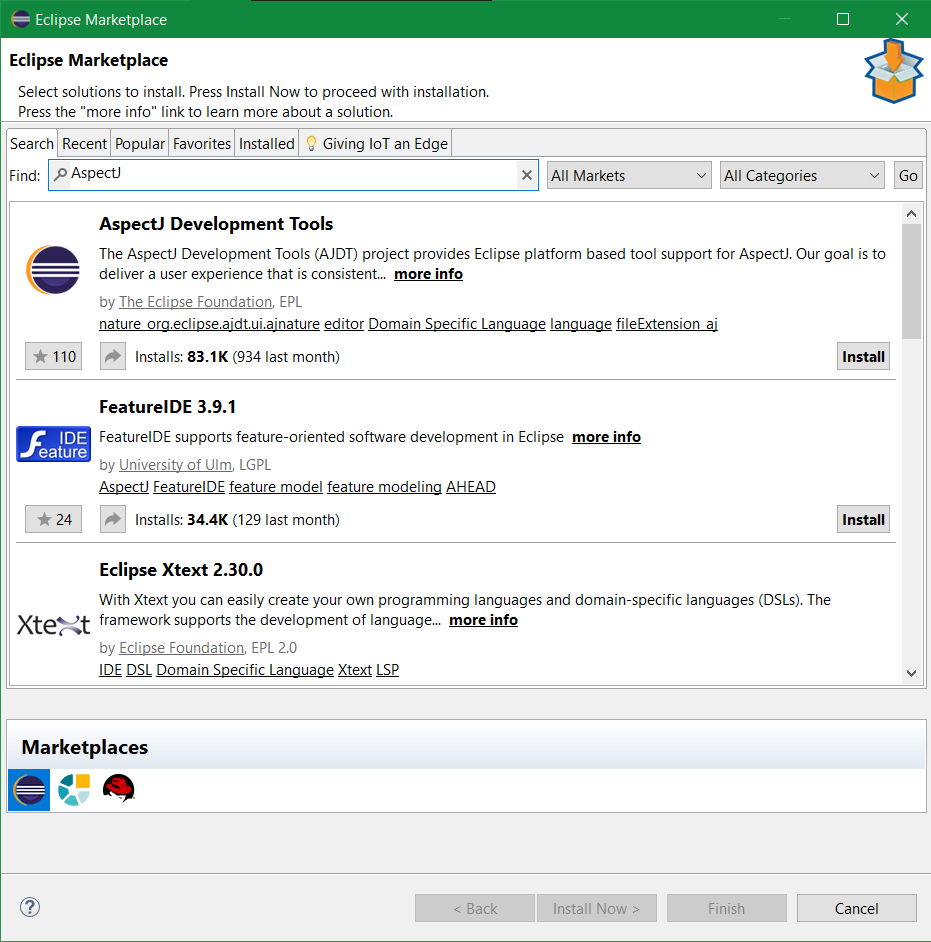
Step 5: Install the AspectJ Development Tools
We have a few more jobs left to complete the installation. The first of these is to download the AspectJ Development Tool using the Eclipse Marketplace. To start with, go to the “Eclipse Marketplace” section from the window that appears when the “Help” button is clicked. Find AspectJ Development Tools using the search button as shown below, and then click “Install”.
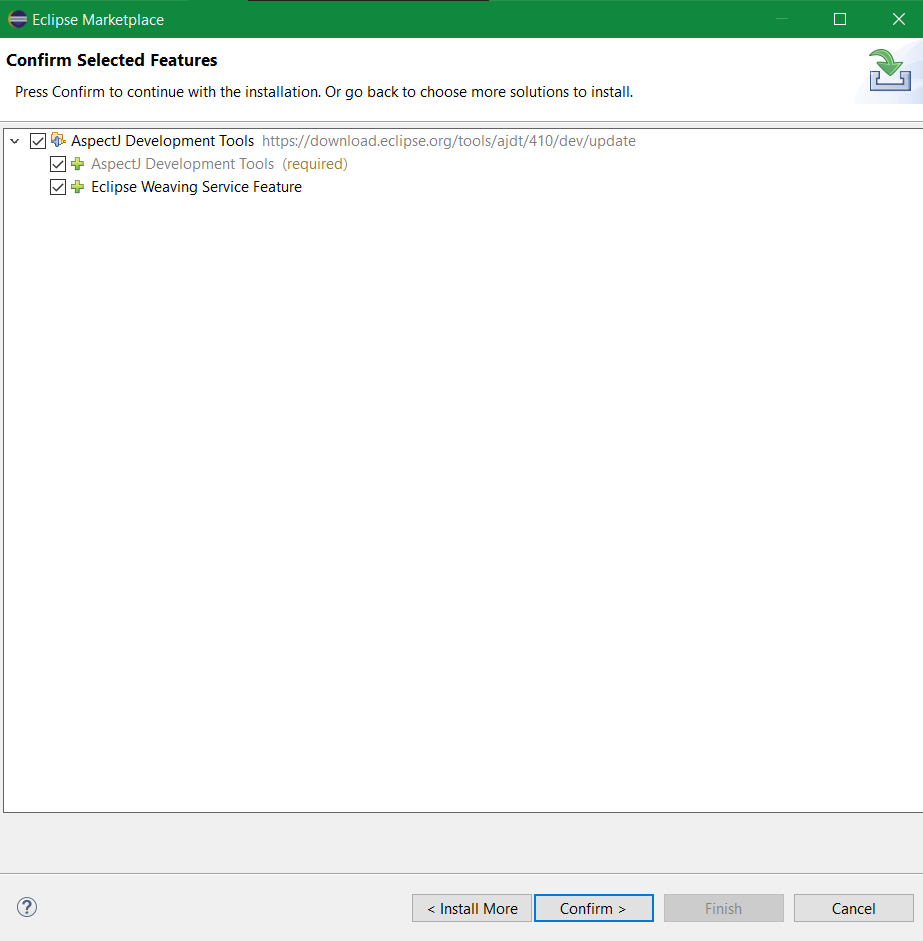
Then, we successfully complete this step by clicking the “Confirm” button on the screen that appears.
Step 6: Install the OCL Required Tools
Now that all of the necessities have been setup, all that is left is to use the update site functionality to install the required OCL tools. To do that, as we did in the previous steps, go to Help>>Install New Software, and a screen like below should appear.
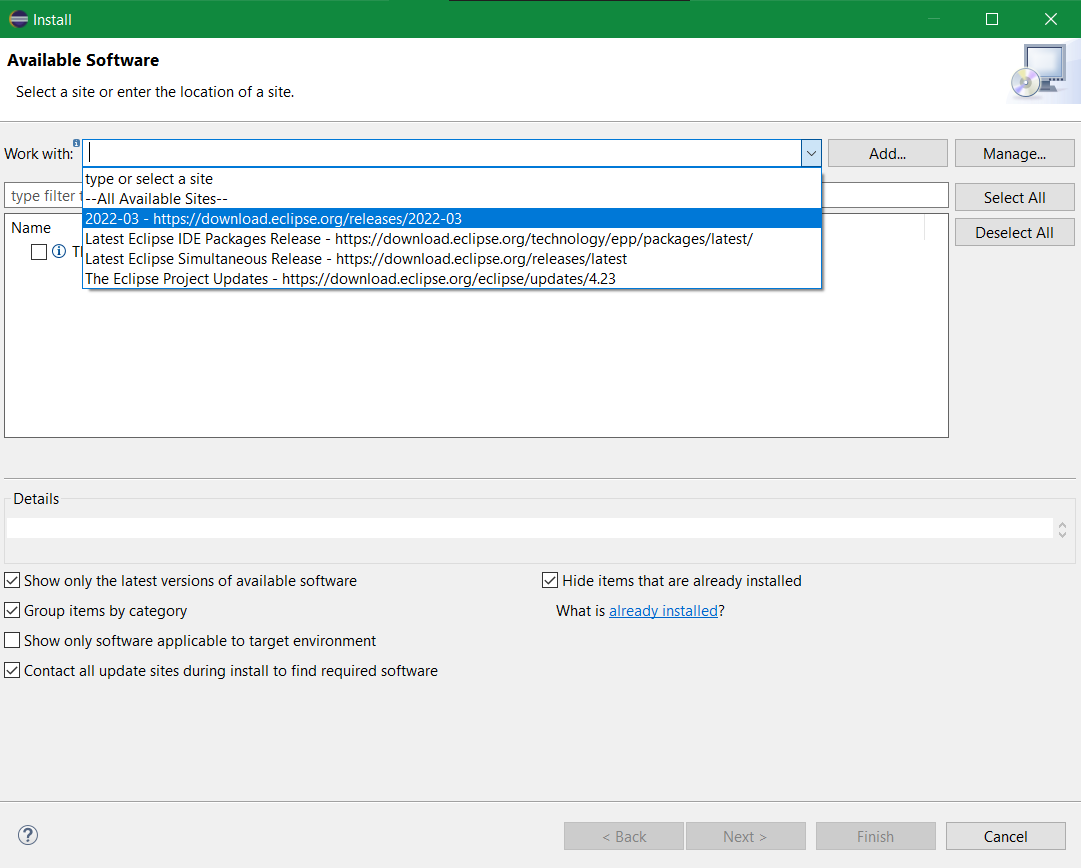
The “2022-03 -https://download.eclipse.org/releases/2022-03” site should be selected from the “Work with” section (as shown above).
Then, list the tools we need by typing “OCL” in the search bar under the “Work with” section.
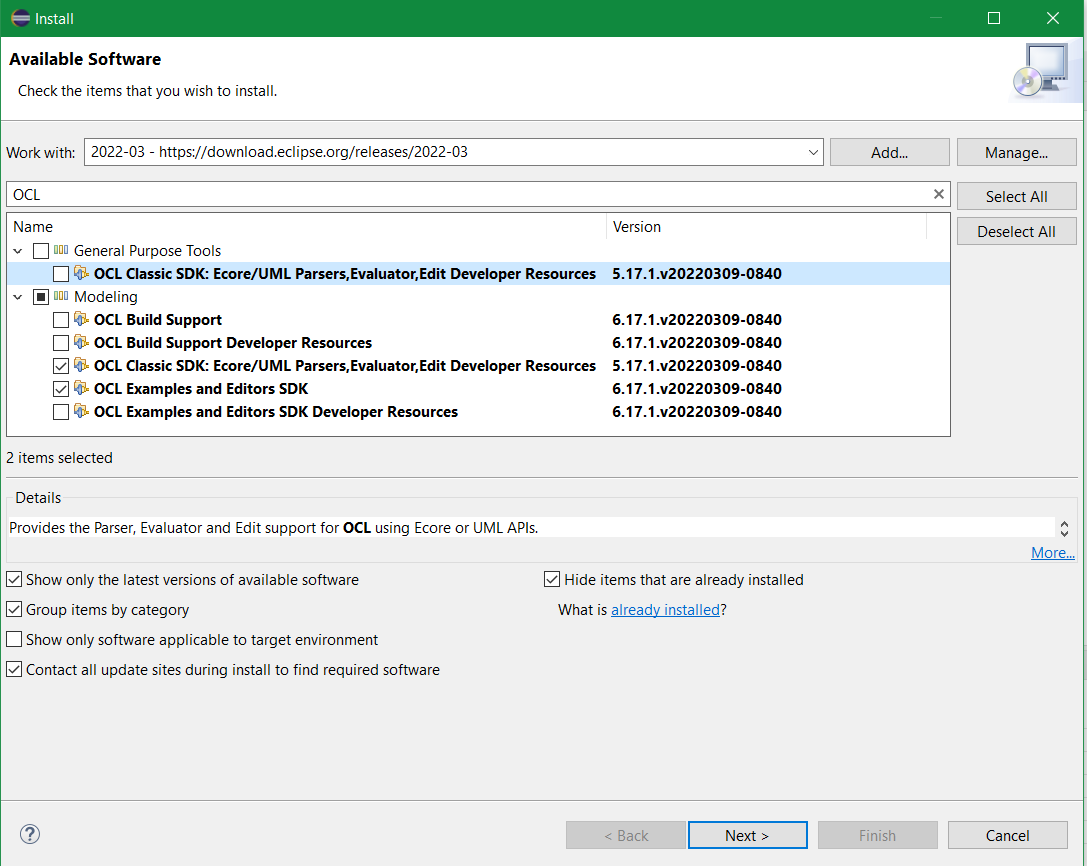
In this part and the last thing we will do is to select the two tools mentioned in the screen shot below and click the “Next” button.
![]()
In the last window, click “Finish”.
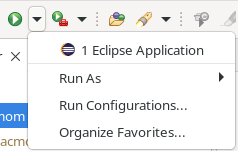
Next, right click on fr.mem4csd.acmom.core.ide project. Select Run As > Eclipse Application

This should be able to run ACMoM in a second Eclipse application.
Now, select the dropdown next to the run button in the toolbar, select Run Configurations…
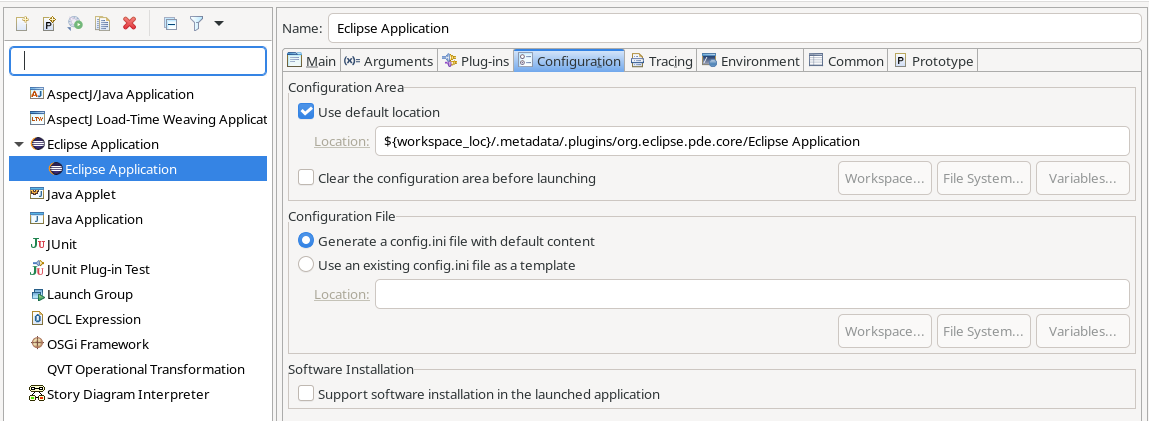
Select the configuration that you ran (default: Eclipse Application)
Go to the Configuration tab and make sure the option ‘Clear the configuration area before launching’ is unchecked.
With this, the project and ACMoM environment setup is ready!