Summary
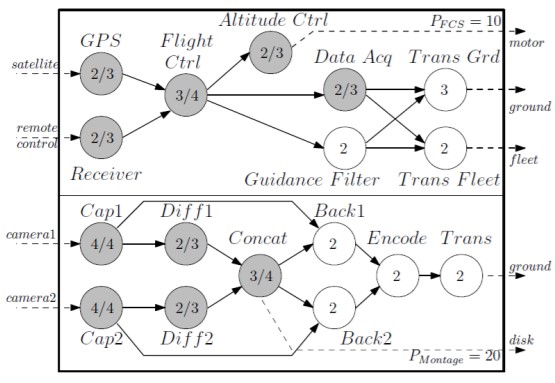
In this scenario, an AADL instance model must first be translated into a model of the MC-DAG language (Figure 1) so that the MC-DAG scheduler can be executed on the model to compute the scheduling tables for the two system operation modes (normal and degraded). However, the initial AADL model must first be validated to ensure it meets the constraints required by the scheduling activity. Once validated, the MC-DAG model is generated from the ASoT AADL instance model using a forward transformation relation between an AADL instance model and a MC-DAG model.

Next, the MC-DAG scheduler is applied to the generated MC-DAG model. The result of this is that a schedule for the tasks is set into the MC-DAG model. This is an in-place transformation of the MC-DAG analysis model.
Such scheduling must then be reflected back into the original AADL instance model so that code generation tools such as RAMSES can generate the operating system configuration files for static scheduling of threads, along with the execution code. This is a backward model transformation between the MC-DAG analysis model and the AADL instance model. In this case, the MC-DAG model is only a partial view of the AADL instance model since it does not contain all information the AADL model contains.
Therefore, the source AADL model should not be regenerated completely but only updated so that the computed AADL scheduling table is set into the instance model. Therefore a backward synchronization transformation is required.
Next, the static scheduling properties of the AADL instance model must also be set into the AADL declarative model in order to make the instance model consistent with its declarative model. This is a backward transformation between an AADL instance model and its declarative model.
Developer Documentation
The MC-DAG projects may be added to the development environment by downloading the Eclipse PSF (Project Set File) here. It is installed the same way as the ACMoM package, over here. However, if this is the first time you are developing this project, you may want to start by downloading the OSATE tool first, using the instructions on this page (if you don’t know what OSATE is, you definitely need to follow the guide).