Prerequisites
a – proceed to installation of osate sources, as specified here:
https://wiki.sei.cmu.edu/aadl/index.php/Getting_Osate_2_sources (only step “Getting the Eclipse and XText environment” is necessary for this tutorial).
b – Install ATL/EMFTVM
From the Eclipse market place (in menu “Help >> Eclipse marketplace”), install the ATL/EMFTVM version 3.8.0
Download the Sources
Invoke the following commands in a shell in order to retrieve sources:
$mkdir sources
a – Download sources of OSATE (develop branch):
$git clone https://github.com/osate/osate2-core.git
b – Download sources of AADLBA-FrontEnd and AADLUtils:
$git clone https://github.com/osate/osate2-ba.git
c – Download RAMSES sources
$git clone https://gitlab.telecom-paristech.fr/mbe-tools/RAMSES.git
Import the Sources into your Eclipse Workspace
Import sources in your Eclipse workspace, as described in following pictures : Click on File → Import…

Select General → Existing Projects into Workspace and click on Next.

Select the folders “sources”, and click on open. The “sources” folder should contain source code of OSATE (folder osate2-core), AADLBA-FronEnd (folder osate2-ba) and RAMSES (folder ramses).
Select all existing projects and click on Finish.

Wait until « build workspace » finishes.
Note 1 : you might have errors with project org.osate.core.tests, but you can ignore them in this tutorial: just close this project.
Note 2 : you might have errors with « .mwe2 » files in osate projects, but you can ignore them in this tutorial.
Launch the OSATE Command Line Interface
Once the code of OSATE, AADLBA-FronEnd, AADLUtils and RAMSES are compiled, you can launch OSATE with the command line interface. A set of examples has been added to the Eclipse projects you have downloaded at step 1-a.
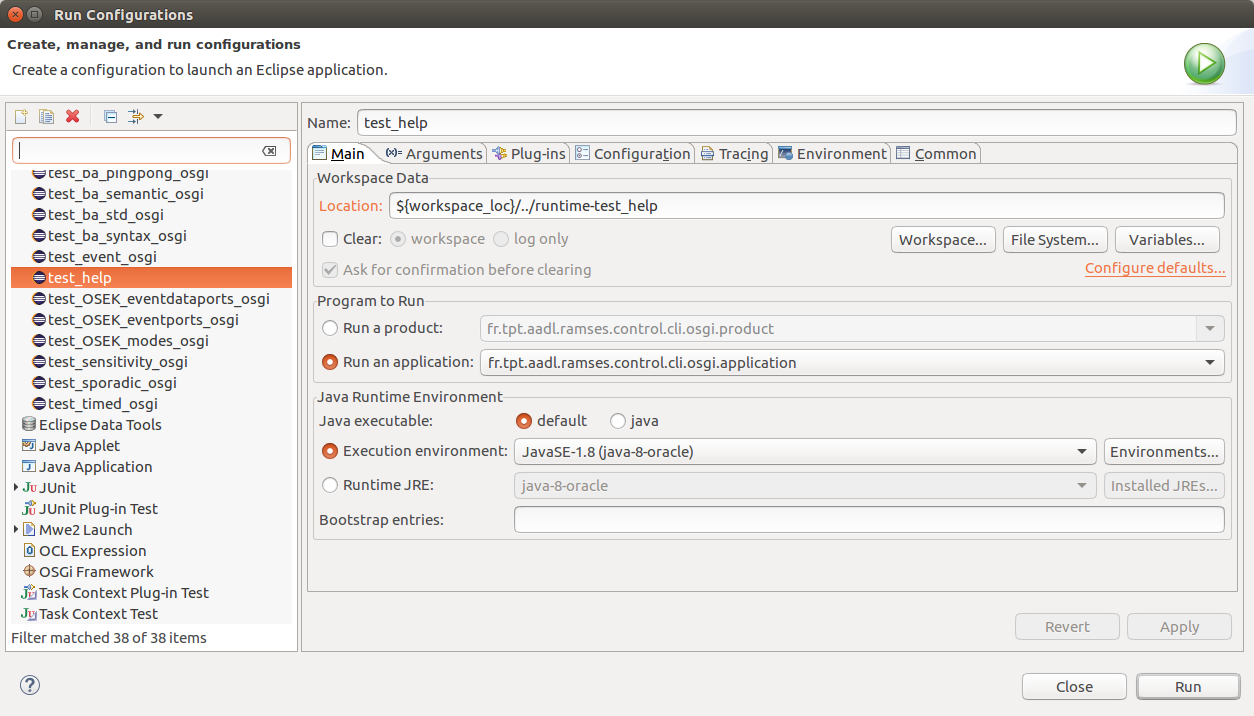
For instance, to know the options of OSATE with a command line interface, launch the « help » Eclipse launch configuration as follows: Click on Run → Run configurations…

Create a new Eclipse Application, call it “test_help”. In the Main tab, select “Run an application” and choose the application like following:
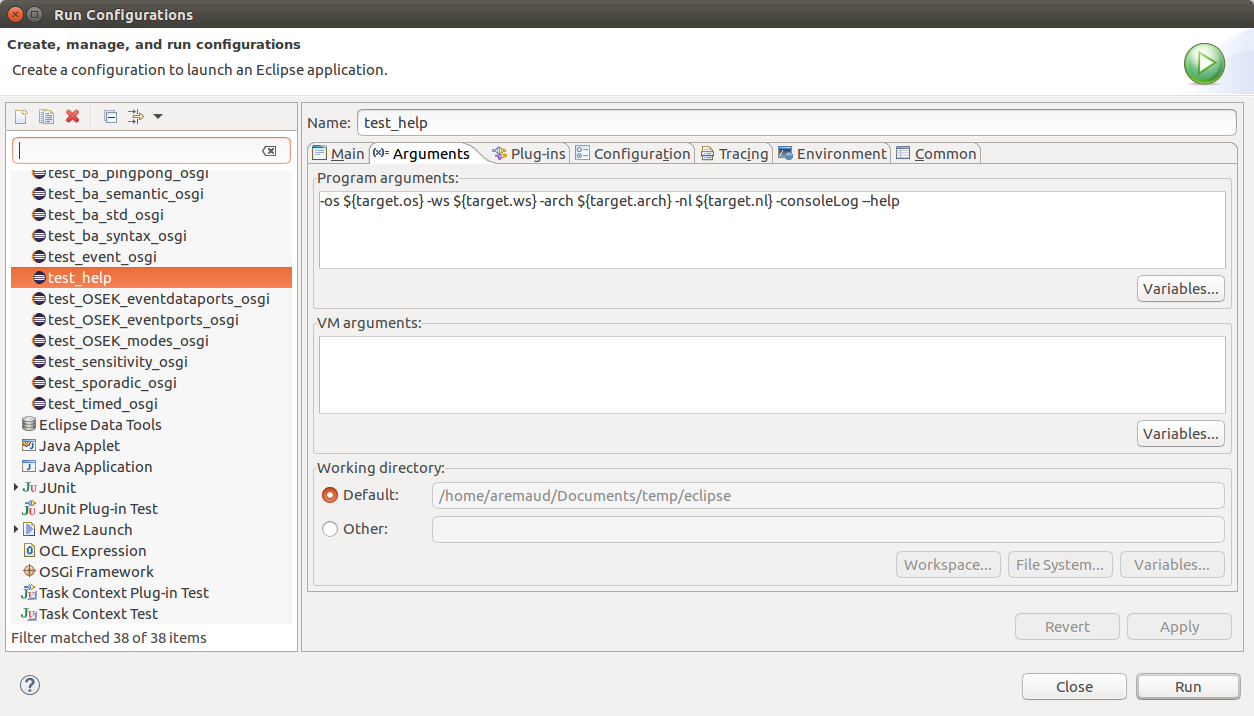
In the Arguments tab, add the option “–help” in the command line of the Program arguments:
Then in the Plug-ins tab, deselect all the Target Plateform plugins.

Click on “Add Required Plug-ins”
Then click on “Validate Plug-ins”. You should have something like this:

Select missing plug-ins (with the required version) from the list of “Target Platform” plug-ins. Once all the required plug-ins have been added, click on run.
The result of this execution displays (in the console view of Eclipse) the set of available options in order to use OSATE with the CLI :
  info:
General Configuration Usage:

[-h|--help] [--parse] [(-l|--log) <logging>] (-m|--model) source_models1,source_models2,...,source_modelsN  [(-i|--include) include_directories1,include_directories2,...,include_directoriesN ] [--analysis] [-a[:analysis_list1,analysis_list2,...,analysis_listN ]] [(-s|--system) <system_to_instantiate>] [(-o|--output) <output_directory>] [(-g|--generation) <target_platform>] [(-r|--runtime-path) <runtime_path>] [--workflow <workflow_path>] [(-p|--parameter) key=value1,key=value2,...,key=valueN ]

  [-h|--help]
        Print help for usage

  [--parse]
        Only parse input models

  [(-l|--log) <logging>]
        enable the logging file and set the level (all | trace | debug | info |
        warn | error | fatal

  (-m|--model) source_models1,source_models2,...,source_modelsN
        List of input aadl files

  [(-i|--include) include_directories1,include_directories2,...,include_directoriesN ]
        List of path to find input models

  [--analysis]
        Parse, instantiate and analyze the instance model

  [-a[:analysis_list1,analysis_list2,...,analysis_listN ]]
        List of analysis to be performed on instance model; available analysis
        identifiers are:

  [(-s|--system) <system_to_instantiate>]
        Name of the system to instantiate in input aadl files

  [(-o|--output) <output_directory>]
        Directory where files will be generated

  [(-g|--generation) <target_platform>]
        Targeted platform for code generation (pok, etc.).

  [(-r|--runtime-path) <runtime_path>]
        Path to the targeted platform runtime

  [--workflow <workflow_path>]
        The specified ecore file contains the workflow

  [(-p|--parameter) key=value1,key=value2,...,key=valueN ]
        additional parameters given as key=value format
Read the different options proposed by RAMSES and configure your own launch to either generate code or perform some analysis.
Integrate your OSATE Plugin with the Command Line Interface
Create a new eclipse plugin project. There are three artefacts this project should contain in order to be registered in the CLI version of osate:
1) a plugin.xml file 2) a factory for your analysis or code generation tool 3) the analysis or code generation entry point
To guide you in this process, we consider the case of a memory footprint analysis plugin that we have developed for OSATE and that we would like to execute with a CLI.
1) Content of the plugin.xml file
<?xml version="1.0" encoding="UTF-8"?> <?eclipse version="3.0"?> <plugin>
  <extension
        point="fr.tpt.aadl.ramses.control.support.analyzer">
     <analyzer
           analysisName="RAMSES-MemoryFootprintAnalysis"
           class="fr.tpt.aadl.launch.MemoryFootprintAnalysisFactory"
           id="fr.tpt.aadl.sched.tools.memoryfootprint">
     </analyzer>
  </extension>
</plugin>
2) The factory class:
public class MemoryFootprintAnalysisFactory implements fr.tpt.aadl.ramses.control.support.analysis.AnalyzerFactory
{

  @Override
  public Analyzer createAnalyzer(AadlModelInstantiatior modelInstantiatior,
                                 PredefinedAadlModelManager predefinedAadlModels)
  {
    return new MemoryFootprintAnalyzer (modelInstantiatior, predefinedAadlModels);
  }
}
3) The analysis class itself
public class MemoryFootprintAnalyzer extends AbstractAnalyzer
{

  private static final String REGISTRY_NAME = "RAMSES-MemoryFootprintAnalysis";
  public final static String PLUGIN_NAME = "Name_Of_Your_Choice" ;
  private final static String PLUGIN_ID = "Name_Of_Your_Choice"  ;

  protected final AadlModelInstantiatior modelInstantiator;
  protected final PredefinedAadlModelManager predefinedAadlModels;

  public MemoryFootprintAnalyzer(AadlModelInstantiatior modelInstantiator,
                                 PredefinedAadlModelManager predefinedAadlModels)
  {
    this.modelInstantiator = modelInstantiator;
    this.predefinedAadlModels = predefinedAadlModels;
  }

  @Override
  public void performAnalysis(SystemInstance systemInstance,
                              RamsesConfiguration config,
                              AnalysisErrorReporterManager errManager,
                              IProgressMonitor monitor)
                                                       throws AnalysisException
  {
    // Put your analysis code here.
  }

  @Override
  public String getRegistryName()
  {
    return REGISTRY_NAME ;
  }

  @Override
  public void setParameters(Map<String, Object> parameters)
  {
    // you can ignore this for now
  }

}
Then the plugin can be called with an Eclipse launch configuration, with options -a RAMSES-MemoryFootprintAnalysis (the plugin registry identifier given in plugin.xml file and MemoryFootprintAnalyzer class.